
Get started with Rejig
Rejig is a tool to create and process images programmatically. After describing the image you want, including its various layers, in a configuration file in YAML or JSON format, Rejig can process each of those layers and export the final image. These are called workflows; the configuration files are manifests.
This becomes especially useful as part of another application where you might want to process user-defined images in a consistent way without needing human intervention.
There are two ways of using Rejig:
- Install and use the Rejig CLI from your terminal
- Install the
rejig-processingpackage in a Node.js project
Terminology
A quick overview of some concepts and what they mean:
| Concept | Meaning |
|---|---|
| Workflow | Describes the way an image is created, through combining various layers and effects. |
| Manifest | A plain text file written in YAML or JSON that describes a workflow. |
| CLI | Command Line Interface: a program that can be accessed through a terminal or command prompt. |
| YAML | A language used mainly for data. Very simple syntax and easy to read. Stored as a plain text file, e.g. example.yaml. |
| JSON | A language used mainly for data. Similar to YAML but uses curly braces ({ and }). Stored as a plain text file, e.g. example.json. |
Installing the Rejig CLI
In order to use the Rejig CLI, you will need to install it first.
- Ensure you have Node.js installed (v16 or higher)
- On MacOS, you can install Homebrew, then run
brew install nodejs - On Linux, you can use your package manager, e.g.
sudo apt update && sudo apt install nodejs npm
- On MacOS, you can install Homebrew, then run
- Install the Rejig CLI with
npm install -g rejig-cli - You can now run
rejig helpto see the available commands (most notably:rejig process <path-to-workflow-file>)
At any point in the future, you can update the CLI by running npm install -g rejig-cli again.
Creating your first workflow
Now that you have the Rejig CLI installed, you might wonder how you can create your first workflow. Hopefully you already have a code editor installed like Visual Studio Code, Notepad++, Sublime Text or any of the many other great options.
-
Create a new YAML file (e.g.
my-first-workflow.yaml) and open it in your preferred editor -
Add the following content:
name: My first workflow size: width: 512 height: 512 layers: - content: type: solid color: r: 255 g: 122 b: 255 a: 1 opacity: 30 - content: type: image location: https://placekitten.com/512/512?image=8 -
Open your terminal or command prompt and navigate to the folder containing the YAML file (e.g.
cd workflows) -
Run
rejig process my-first-workflow.yaml -
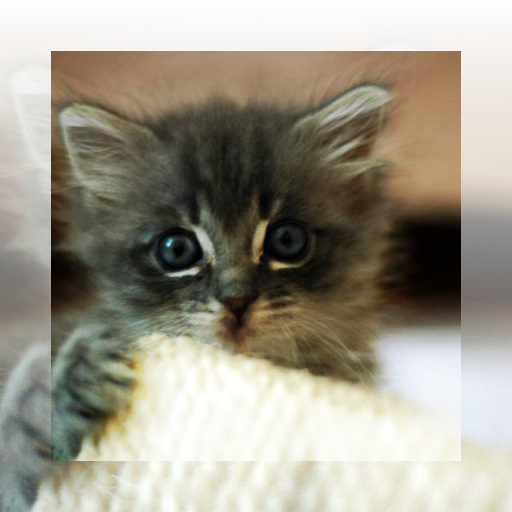
Voilà! You should now have an image
My first workflow.pngin the same folder, containing a cute kitten photo 😸
 (
(CLI commands & flags
The easiest way of finding out what the Rejig CLI can do is by running rejig help or rejig help <command>.
For example: rejig help process will show you how to use the process command. You'll see that it takes one argument, which is the path to a workflow or a folder.
- If specifying the path to a workflow file (in YAML or JSON format), the command will process the workflow and then exit.
- If specifying the path to a folder, it will scan that folder for workflow files and execute them all, then exit.
By default, the output image will use the same file name as the workflow file (e.g. my-custom-workflow.yaml will output my-custom-workflow.png) unless the name property is present in the workflow file. In that case, it will use the name as the file name.
You might also have noticed that it takes two flags, which you can use like this: rejig process <path-to-workflow> --watch or rejig process <path-to-workflow> --out=some-folder-for-output.
--watch(or-w) will process the workflow(s) as normal and then watch for changes to those files; if changes to those files are saved, it will process that workflow again.--out(or-o) lets you specify a particular folder where it will save the output images.
Sharing workflows with push and pull
In order to make it easier to share workflows, Rejig allows you to push your workflows for others to pull. This also means you can pull existing workflows and use them.
When you have created a workflow you are happy with and you are ready to share it, you'll need to make sure you are logged in using the CLI, which you can do using rejig login.
Then you can push your workflow using the command rejig push <workflow-file> <name>. For example: rejig push my-custom-workflow.yaml kittens.
Workflows become available to others by referencing your username and the workflow name. For example, if your username is catlady and you created a workflow kittens, it will be available to others by the name catlady/kittens, by using the following command: rejig pull catlady/kittens or by using the workflow layer content type inside your workflow file.
You can also choose to push workflows with an optional tag. This is useful to provide different versions of a workflow as you make changes. When pushing or pulling you can specify a tag in this format: <username>/<workflow>:<tag>. Using the example above, you could push a workflow like this: rejig push my-custom-workflow.yaml kittens:v1.0.0 which would become available to others by referencing: catlady/kittens:v1.0.0. By default, if you don't specify a tag, it is set to latest.
You can see what workflows you have published using rejig list and inspect what tags are available for any workflow using rejig tags <username>/<workflow>.
Workflow schema
The full Workflow schema is available in the Rejig.Processing documentation.
To make it easier to edit JSON or YAML files in your code editor, you can add a reference to the Workflow schema by adding this to your workflow files:
YAML:
# yaml-language-server: $schema=https://raw.githubusercontent.com/Cryptacular/Rejig.Processing/master/json-schema/workflow.json
JSON:
{
  "$schema": "https://raw.githubusercontent.com/Cryptacular/Rejig.Processing/master/json-schema/workflow.json"
}
This should enable autocompletion and validation in your code editor (if supported) so you can see if the workflow you've created is valid.
Layer content types
For each layer you create, you can specify what type of content it contains (using the content property).
| Content type | Description |
|---|---|
image | Adds an image from your local drive or a URL. Uses additional property location to specify where the image is located. |
solid | Adds a layer of a solid color. Uses additional property color with r, g,b and a values. |
gradient | Adds a linear gradient between two colors. Uses additional properties color and pos, each with from and to values. |
workflow | Adds a layer using the output of a workflow that's been published to Rejig, using the format <username>/<workflow> or <username>/<workflow>:<tag>. |
Examples
Image
# Image
size:
  width: 256
  height: 256

layers:
  - content:
      type: image
      location: https://placekitten.com/256/256?image=7
 (
(Solid
# Solid
size:
  width: 256
  height: 256

layers:
  - content:
      type: solid
      color:
        r: 255
        g: 0
        b: 122
        a: 1

Gradient
# Gradient
size:
  width: 256
  height: 256

layers:
  - content:
      type: gradient
      color:
        from:
          r: 0
          g: 255
          b: 122
          a: 1
        to:
          r: 122
          g: 0
          b: 122
          a: 0.8
      pos:
        from:
          x: 256
          y: 0
        to:
          x: 0
          y: 256

Workflow
# Workflow

size:
  width: 120
  height: 120

layers:
  - content:
      type: workflow
      workflow: cryptacular/something:1.0.4

Going beyond the basics
In the simple example above, we created a workflow with a single layer that referenced an image. By itself, that's not particularly useful. We can however do a few useful things with this image, such as scaling it up or down, moving it around, or placing it so it fits within the bounds of our image or making sure it covers the entire image.
Here is a list of properties we can add to any layer:
| Property | Description |
|---|---|
opacity | The opacity of the layer. 0 = transparent, 100 = fully visible. |
position | Where the layer is placed. Takes x and y values. Defaults to { x: 0, y: 0 }. |
scale | Scale the layer up and down in its x and y axes. Defaults to 1. |
placement | Place the layer so it fits within the bounds of the image (fit), cover the whole image (cover), or stretch to fit (stretch). Defaults to custom. |
origin | Lets you specify where the origin of the layer content (e.g. image) is. The origin point is used as a reference point for positioning and scaling the layer content. Some examples: center center, top left, center right. Defaults to top left. |
alignment | Just like origin except this controls where in the layer the content is placed (before position and scale are applied). |
blendingMode | This changes how a layer affects the layers underneath it. By default this is set to normal which just draws the layer on top of the layers below. Blending modes like multiply and darken will make your image darker and ignores light values, whereas add and screen will make your image lighter and ignores dark values. Play around to see what works best. |
mask | This is effectively a nested layer. However, instead of being drawn like a regular layer, it takes light and dark values of the mask and uses those to control the opacity of the layer this is used on. Black values will become transparent, whereas white values will remain visible. |
An example of how you might use these properties:
size:
  width: 512
  height: 512

layers:
  - content:
      type: image
      location: https://placekitten.com/512/512?image=1
    mask:
      content:
        type: gradient
    blendingMode: overlay
  - content:
      type: image
      location: https://placekitten.com/512/512?image=1
    opacity: 100
    position:
      x: 0
      y: 0
    scale:
      x: 0.8
      y: 0.8
    placement: custom
    origin: center center
    alignment: center center
This results in the following image:
 (
(Further topics coming soon
- Parameters
- How to use the Node.js library
- Links to repositories to contribute